Deploying Open Data Hub with Elyra
This document outlines how to perform a quick deployment of Kubeflow, JupyterHub and Elyra on Open Data Hub (ODH) using the Open Data Hub Operator.
Note the following:
- The instructions in this document utilize default configurations, which are unlikely to meet the requirements of a production deployment.
- By completing the steps in this document Kubeflow 1.3, JupyterHub v1.4, and Elyra v2.2.4 are deployed in the
kubeflowproject/namespace. - The Kubeflow Central dashboard is unsecured.
- The JupyterHub GUI is secured by OpenShift.
Requirements
Verify that the following requirements are met.
- Access to a v4.x Red Hat OpenShift Cluster (16 GB RAM, 6 CPUs, and 45G of disk space) with internet connectivity.
- The OpenShift CLI (
oc) is installed locally.- Installation instructions for Windows and MacOS
Prepare for deployment
Open the OpenShift web console in a browser and log in.
Copy the login command.
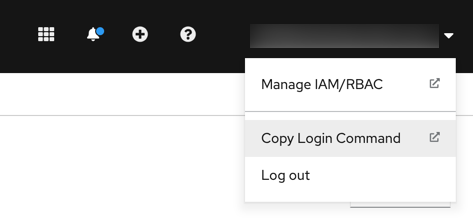
Open a terminal window and run the copied command.
$ oc login --token=TOKEN_VAL --server=https://SERVER:PORT
Create a new project named
kubeflow.$ oc new-project kubeflow
Verify that the CLI is using the new
kubeflowproject.$ oc project kubeflow
Keep the terminal window open.
Install the Open Data Hub Project Operator on OpenShift
The Open Data Hub Project Operator manages installation, configuration, and the lifecycle of Open Data Hub projects. The operator is available on OpenShift OperatorHub as a community operator.
To install the operator:
- Open the OpenShift web console and log in.
- Switch to the
Administratorview. - Open the projects list (
Home>Projects).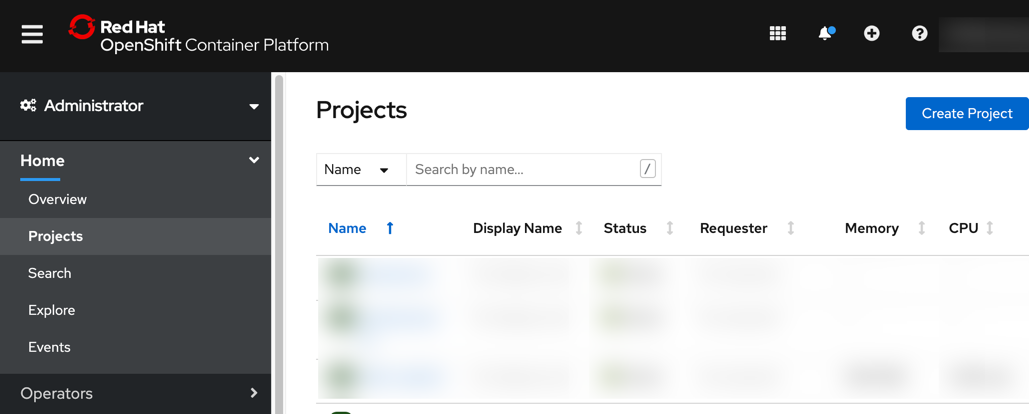
- Switch to the
kubeflowproject.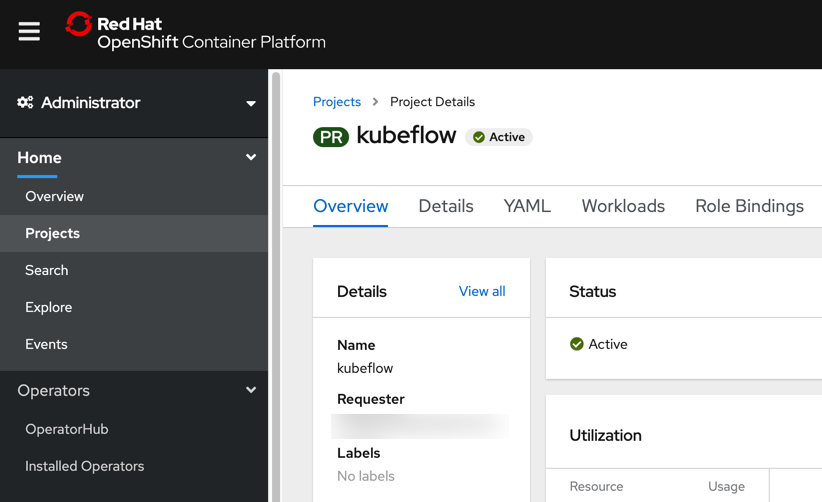
- Open the Operator Hub page (
Operators>OperatorHub). - Search for the
Open Data Huboperator.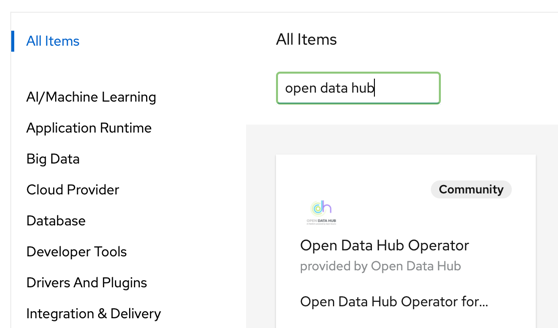
- Install the operator, keeping the default values.
- Navigate to
Operators>Installed Operatorsand wait for the operator installation to complete.
Next, you’ll install Kubeflow using the operator.
Deploy Kubeflow on OpenShift
To deploy Kubeflow using the Open Data Hub operator:
Select the
Open Data Huboperator from the list of installed operators.On the operator details page select the
Detailstab, if it is not opened by default.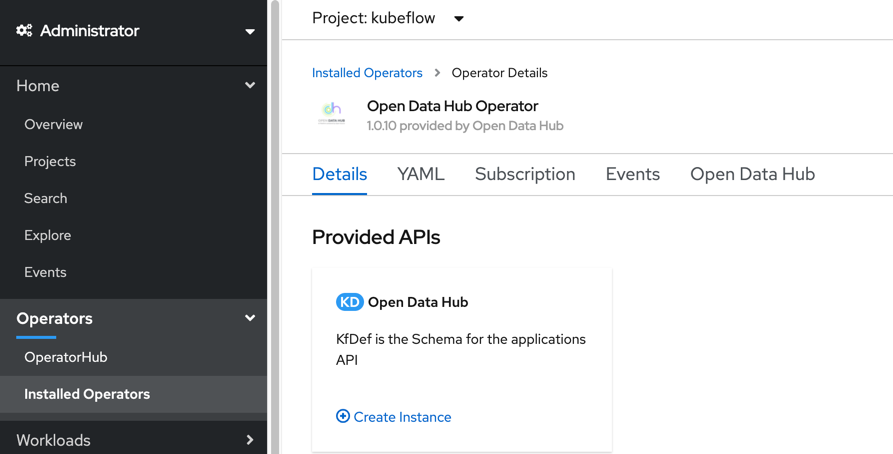
Create a new deployment by clicking
Create instance.Select
Configure via YAML view.Remove the default deployment configuration in the editor.
Open this Kubeflow v1.3 deployment file for OpenShift in a new browser tab/window.
Copy and paste the content of this file into the editor.
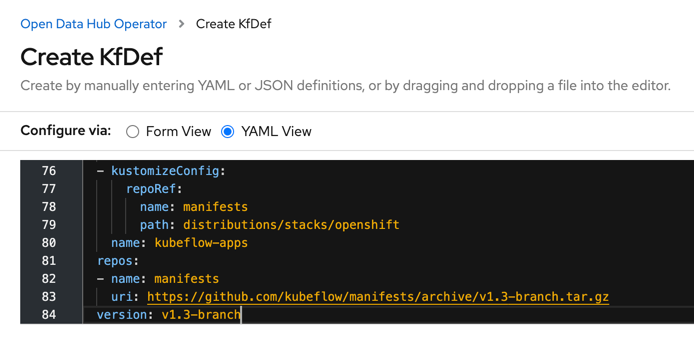
Click
Createto deploy Kubeflow on the cluster.In the terminal window monitor the deployment progress by periodically listing pods in the
kubeflownamespace. Wait until all pods are running. This might take a couple minutes.$ oc get pods --namespace kubeflow
Upon successful deployment you can access the Kubeflow Central dashboard using a public route.
In the terminal window run the following command to retrieve the public Kubeflow Central dashboard URL:
$ oc get routes -n istio-system istio-ingressgateway -o jsonpath='http://{.spec.host}'Open the displayed URL in a web browser to access the Kubeflow Central dashboard.
Do not select a namespace entry, if you’ve deployed Kubeflow using the defaults.
The Kubeflow deployment is complete. As part of this deployment an instance of the MinIO object storage was provisioned.
Next, you’ll create a public endpoint for this service that provides you access to the MinIO GUI.
Expose the MinIO object storage service
Elyra utilizes object storage to persist artifacts during pipeline processing. The MinIO GUI provides a basic GUI that is not exposed publicly by default.
To make the GUI available:
In the terminal window create a public endpoint for the MinIO service that was deployed alongside Kubeflow.
$ oc create route edge --service=minio-service --namespace=kubeflow --port=9000 --insecure-policy=Redirect
Retrieve the public MinIO URL.
$ oc get routes -n kubeflow minio-service -o jsonpath='https://{.spec.host}'Open the displayed URL in a web browser to access the MinIO GUI. Log in using the default credentials (
minio/minio123).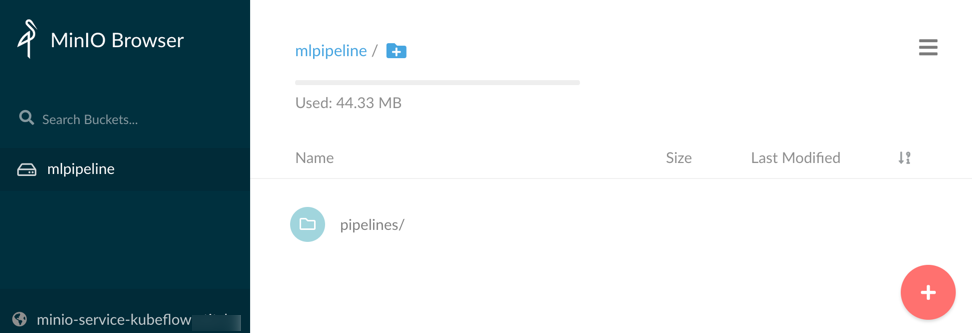
Note the
mlpipelinebucket. This bucket is used by Kubeflow and should not be deleted!Take note of the following information. You’ll need it later when you create a runtime configuration in Elyra, so that you can run pipelines in this Kubeflow deployment.
- The MinIO GUI URL (
http://minio-service-kubeflow...). - The MinIO access key (
minio). - The MinIO secret key (
minio123).
- The MinIO GUI URL (
Next, you’ll install JupyterHub with Elyra support.
Deploy JupyterHub (with Elyra) on OpenShift
In Open Data Hub, notebooks are served using JupyterHub. The default deployment includes a container image that has JupyterLab with the Elyra extensions pre-installed.
To deploy JupyterHub and its dependencies:
Open the OpenShift web console.
Navigate to
Operators>Installed Operators.Select the
Open Data Huboperator from the list of installed operators.On the operator details page select the
Detailstab, if it is not opened by default.Create a new deployment by clicking
Create instance.Select
Configure via YAML view.Remove the default deployment configuration in the editor.
Copy and paste the following deployment configuration into the editor. This minimal configuration installs common ODH options, JupyterHub, and container images that serve Jupyter notebooks. One of these images, which is named
s2i-lab-elyra:vX.Y.Z, has JupyterLab with Elyra pre-installed.apiVersion: kfdef.apps.kubeflow.org/v1 kind: KfDef metadata: annotations: kfctl.kubeflow.io/force-delete: 'false' name: opendatahub namespace: kubeflow spec: applications: # REQUIRED: This contains all of the common options used by all ODH components - kustomizeConfig: repoRef: name: manifests path: odh-common name: odh-common # Deploy Jupyter Hub - kustomizeConfig: parameters: - name: s3_endpoint_url value: s3.odh.com repoRef: name: manifests path: jupyterhub/jupyterhub name: jupyterhub # Deploy Jupyter notebook container images - kustomizeConfig: overlays: - additional repoRef: name: manifests path: jupyterhub/notebook-images name: notebook-images repos: - name: manifests uri: 'https://github.com/opendatahub-io/odh-manifests/tarball/v1.0.11' version: v1.0.11 status: {}
Note: Above deployment configuration utilizes version 1.0.11 of the Open Data Hub manifests, which includes Elyra v2.2.4.
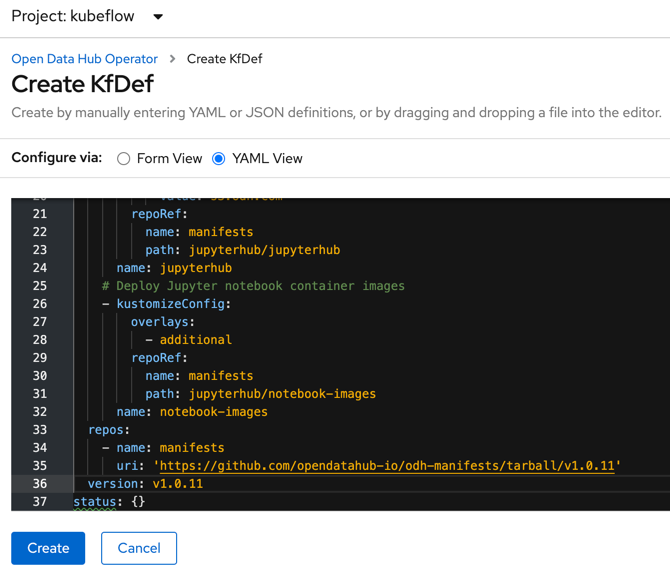
Click
Createand wait for the deployment to complete.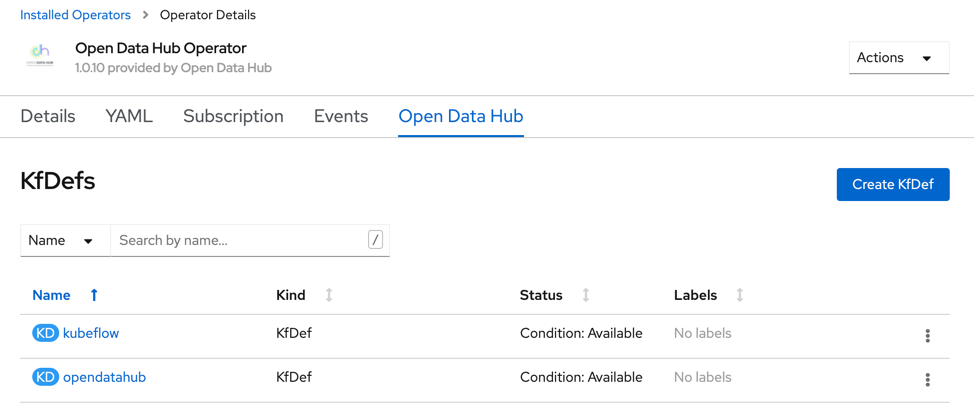
Next, you’ll use the JupyterHub spawner to launch Elyra.
Access Elyra using the JupyterHub Spawner page
The JupyterHub instance you’ve deployed includes a container image that has JupyterLab with the Elyra extensions installed.
To run this image:
In the terminal window run this command to retrieve the exposed JupyterHub URL:
$ oc get routes -n kubeflow jupyterhub -o jsonpath='http://{.spec.host}/'Open the displayed URL in a browser, and, if required, log in.
On the JupyterHub Spawner page select
s2i-lab-elyra:vX.Y.Zas notebook image.
Note: The image tag version does not represent the Elyra version.
Once the container image was pulled and the container is running the JupyterLab GUI with the Elyra extensions opens in the browser window.
In the JupyterLab Launcher window navigate to the
Othercategory and open a terminal.
Enter
elyra-pipeline --versionto display the Elyra version:
Next, you’ll create a runtime configuration if you already have Kubeflow deployed in this cluster. If you don’t have Kubeflow installed skip the next section.
Create a Kubeflow Pipelines runtime configuration
In Elyra runtime configurations are used to provide the tooling access to external resources where pipelines can be executed.
To create a runtime configuration that allows for running of pipelines on the Kubeflow instance you’ve deployed:
Select the
Runtimestab from the JupyterLab side bar.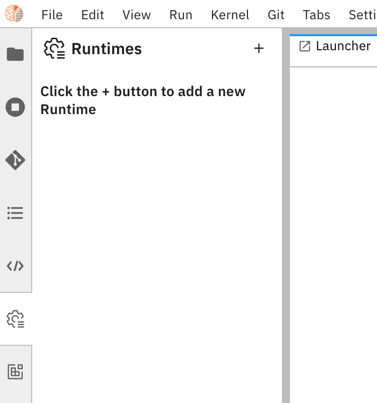
Click
+andNew Kubeflow Pipelines runtime.Enter the following Kubeflow and MinIO configuration information, assuming you’ve performed a Kubeflow quick install using the linked manifest:
Name:
Local Kubeflow PipelinesKubeflow Pipelines API Endpoint: the output from command
$ oc get routes -n istio-system istio-ingressgateway -o jsonpath='http://{.spec.host}/pipeline'Kubeflow Pipelines User Namespace: leave empty, if Kubeflow deployment defaults were used
Kubeflow Pipelines API Endpoint Username: leave empty, if Kubeflow deployment defaults were used
Kubeflow Pipelines API Endpoint Password: leave empty, if Kubeflow deployment defaults were used
Kubeflow Pipelines Engine:
Tekton, if Kubeflow deployment defaults were usedCloud Object Storage Endpoint: the output from command
$ oc get routes -n kubeflow minio-service -o jsonpath='https://{.spec.host}'Cloud Object Storage Credentials Secret: leave empty
Cloud Object Storage Username:
minioif Kubeflow deployment defaults were used, otherwise the appropriate idCloud Object Storage Password:
minio123if Kubeflow deployment defaults were used, otherwise the appropriate passwordCloud Object Storage Bucket Name:
elyra-pipeline-storage
Save the runtime configuration.
This concludes the quick deployment and configuration tasks.