Deploying Open Data Hub with Elyra
In this example we will show how to deploy the Elyra Image to be used with Open Data Hub.
An installation will consist of the deploying both the ODH Operator and Kubeflow in the same cluster.
Requirements
- An OpenShift Cluster
- Since we will be installing both ODH and Kubeflow our preferred resource requirements will be:
- 16 GB memory, 6 CPUs, and 45G of Disk Space
- oc (OpenShift Command Line Interface)
- Installation instructions for Windows and MacOS
- kfctl (Kubeflow Deployment Tool)
- Latest releases can be found in the kfctl Github Repository
- Extract the kfctl binary from the tar into a directory on your
PATH
Install KubeFlow on OpenShift
- Installation Instructions for Kubeflow can be found in the OpenDataHub Documentation
Accessing the Kubeflow Pipelines Main Dashboard
- After deploying Kubeflow to your OpenShift cluster, setup port forwarding to your
Kubeflowinstallation - In your workstation, run
oc port-forward svc/istio-ingressgateway -n istio-system 8080:80 & - You should be able to reach the Kubeflow Pipelines Dashboard by navigating to:
http://localhost:8080/pipeline/#/pipelines
Installing the Open Data Hub Operator on OpenShift
After installing our requirements on our local workstation, we want to install the ODH Operator in our OpenShift Cluster.
- Open your web browser to the OpenShift Dashboard and navigate to the
Projectspage under theHomeDropdown on the left side menu - Click on
Create Projectand create give it a name e.g. elyra or odh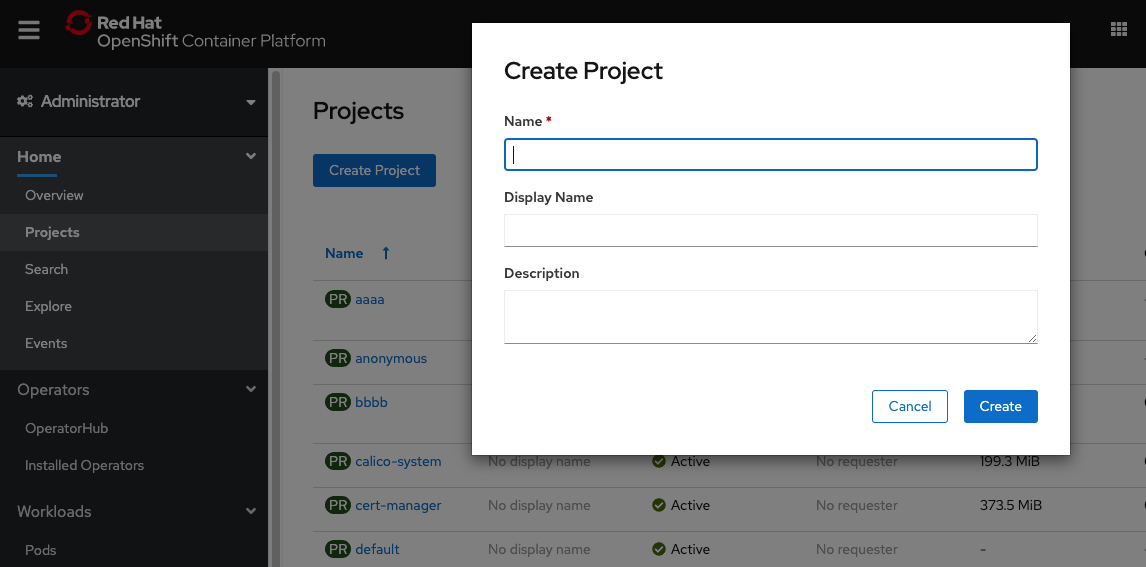
- After creating the Project navigate to the
OperatorHubpage and search foropendatahub - Open the Open Data Hub tile and click on
Install, leave all options as is at their default settings. - Once the Operator has finished installing, navigate to the
Installed Operatorspage under theOperatorsdropdown and click on ‘Open Data Hub’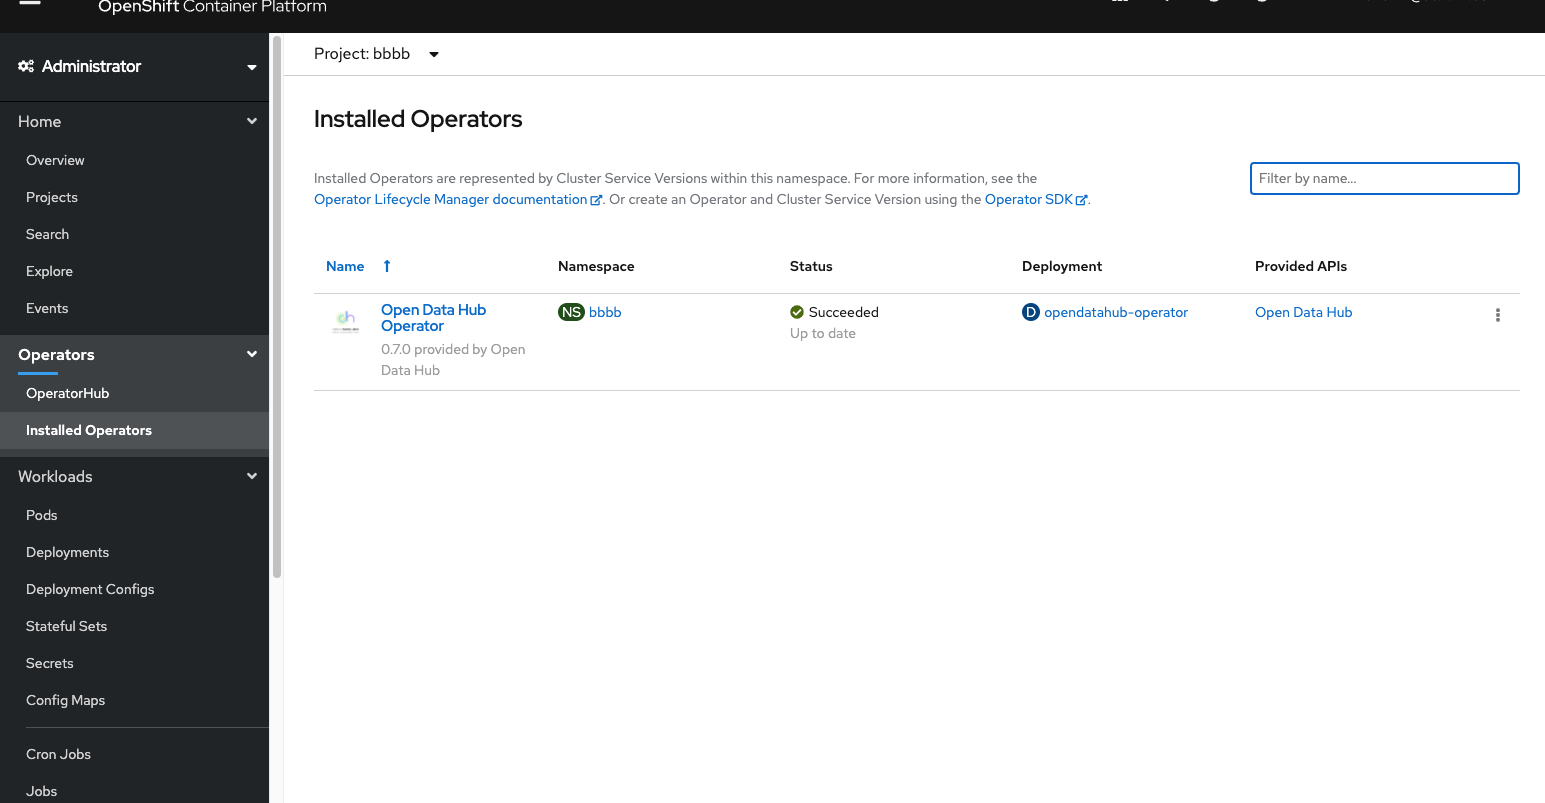
- Click on
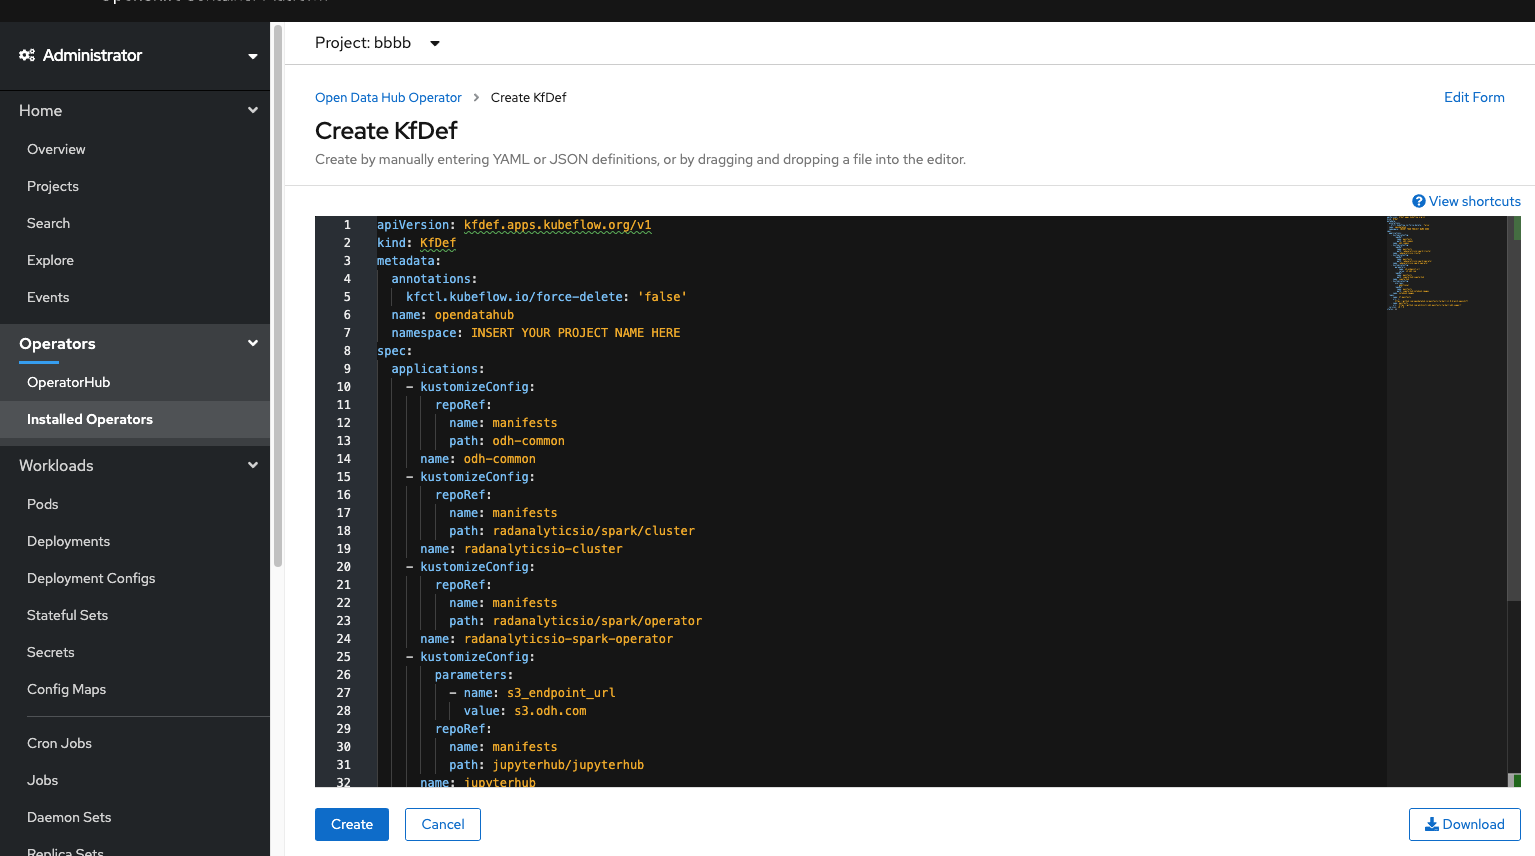
Create KfDef, then select ‘YAML View’. You should now see a default configuration. Replace it with the following:
NOTE: Make sure to fill in the namespace field with theProjectname you created earlier
apiVersion: kfdef.apps.kubeflow.org/v1
kind: KfDef
metadata:
  annotations:
    kfctl.kubeflow.io/force-delete: 'false'
  name: opendatahub
  namespace: INSERT YOUR PROJECT NAME HERE
spec:
  applications:
    - kustomizeConfig:
        repoRef:
          name: manifests
          path: odh-common
      name: odh-common
    - kustomizeConfig:
        repoRef:
          name: manifests
          path: radanalyticsio/spark/cluster
      name: radanalyticsio-cluster
    - kustomizeConfig:
        repoRef:
          name: manifests
          path: radanalyticsio/spark/operator
      name: radanalyticsio-spark-operator
    - kustomizeConfig:
        parameters:
          - name: s3_endpoint_url
            value: s3.odh.com
        repoRef:
          name: manifests
          path: jupyterhub/jupyterhub
      name: jupyterhub
    - kustomizeConfig:
        overlays:
          - additional
        repoRef:
          name: manifests
          path: jupyterhub/notebook-images
      name: notebook-images
  repos:
    - name: kf-manifests
      uri: >-
        https://github.com/opendatahub-io/manifests/tarball/v1.0-branch-openshift
    - name: manifests
      uri: 'https://github.com/opendatahub-io/odh-manifests/tarball/v0.8.0'
  version: v0.8.0
status: {}
- This kfdef configuration will install a minimal deployment of Open Data Hub.
NOTE: The Argo Workflow controller is explicitly not included in the kfdef due a conflict with the Argo controller that comes with a standard installation of Kubeflow. The removal is only required when both Open Data Hub and Kubeflow are installed in the same namespace.
- Click on ‘Create’
- The
Open Data Hub Operatorshould now be installing a basic deployment of JupyterHub on ODH.
Accessing the ODH JupyterHub Landing/Spawner Page
- There are many ways to access the Landing Page, in this example we assume the user is using the default installation and not making any modifications to the network services for the application e.g. Using Istio or opening up NodePorts
- In your
OpenShift Dashboard, in the upper right corner click on your username, and thenCopy Login Commanda new page should pop up and then click onDisplay Token. Copy theoc logincommand.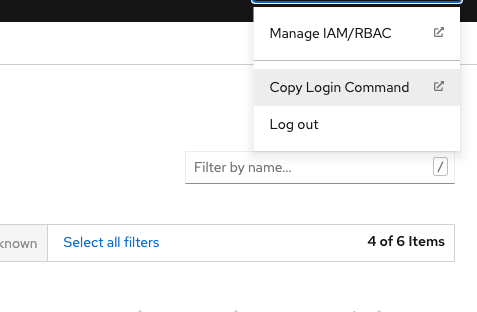
- On your local workstation, paste the
oc logincommand, this will allow you to control your cluster your workstation. - Open a proxy to your cluster
oc proxy &, this will run in the background. - Navigate to the
Landing Pagein your browser. NOTE: Replace theProjectname in the URL with your own http://localhost:8001/api/v1/namespaces/INSERT_PROJECT_NAME/services/http:jupyterhub:8080/proxy
Using Elyra with Open Data Hub
- In the JupyterHub landing/spawner page, ensure you set the following two environmental variables before starting a notebook
| NAME | VALUES | REQUIRED | DESCRIPTION |
|---|---|---|---|
| COS_BUCKET | A-Z, a-z, 0-9, -, . | This will be the bucket that your artifacts will be sent to post notebook execution. This can be modified in the Elyra Metadata Editor at runtime. Default value: 'default' |
Accessing Default Object Storage
- When using the default metadata runtime created, pipeline artifacts will be sent to the
MinioS3 object storage instance installed when Kubeflow Pipelines is installed - Setup port forwarding to
Miniowith the following :
oc port-forward svc/minio-service -n kubeflow 9000:9000 &
- You should be able to reach the
MinioDashboard in your web browser by navigating tolocalhost:9000