Notebook Pipelines
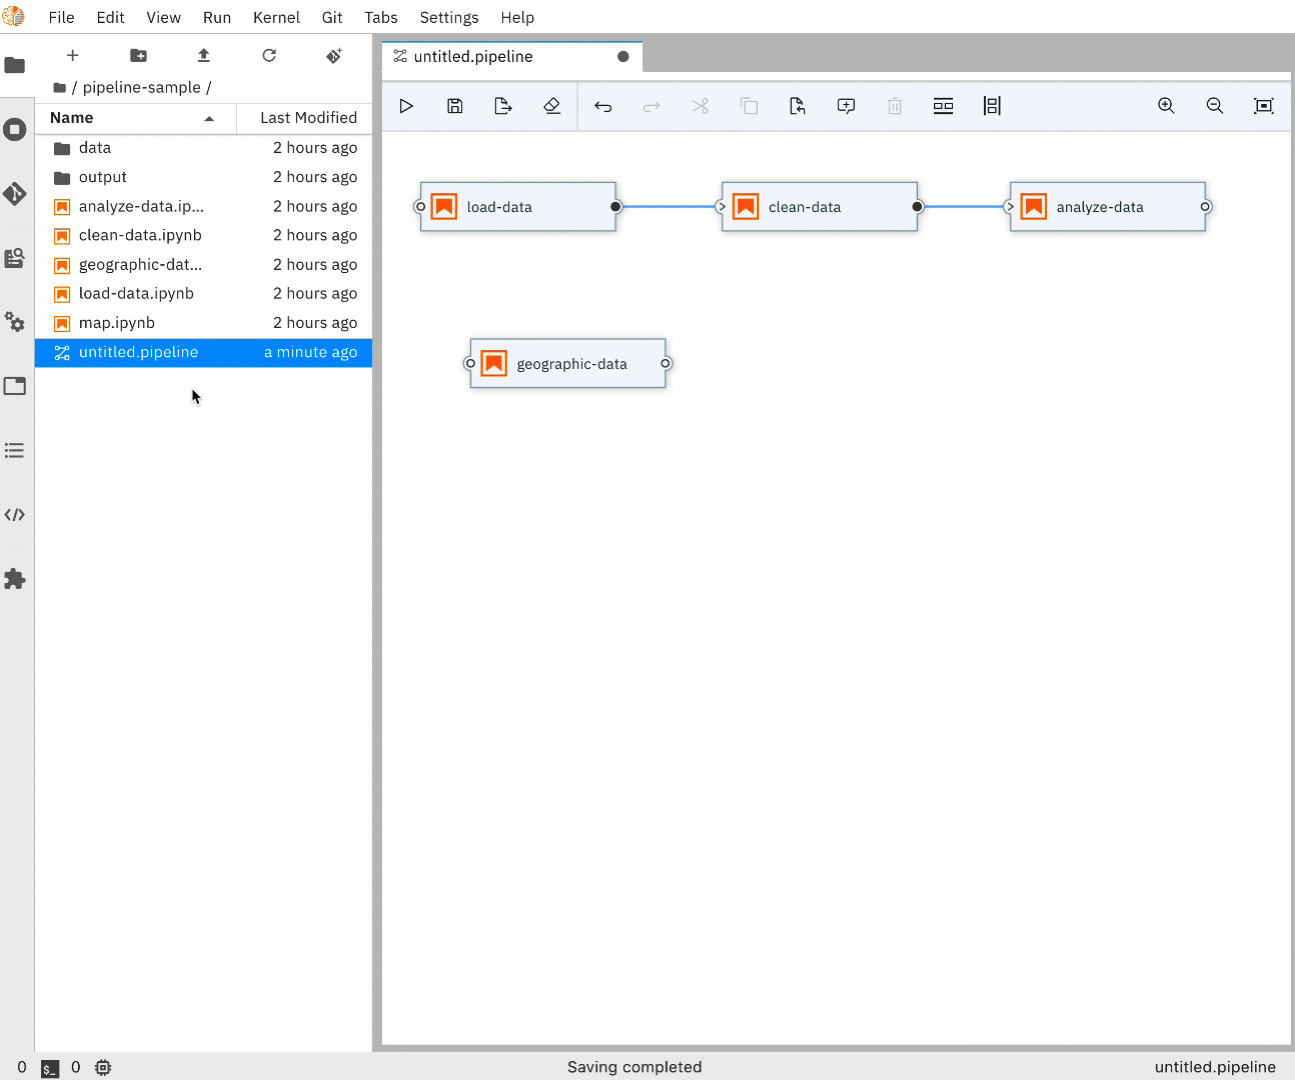
Elyra utilizes its canvas component to enable assembling multiple notebooks as a workflow. Elyra provides a visual editor for building Notebook-based AI pipelines, simplifying the conversion of multiple notebooks into batch jobs or workflows. By leveraging cloud-based resources to run their experiments faster, data scientists, machine learning engineers and AI developers are then more productive, allowing them to spend time utilizing their technical skills.
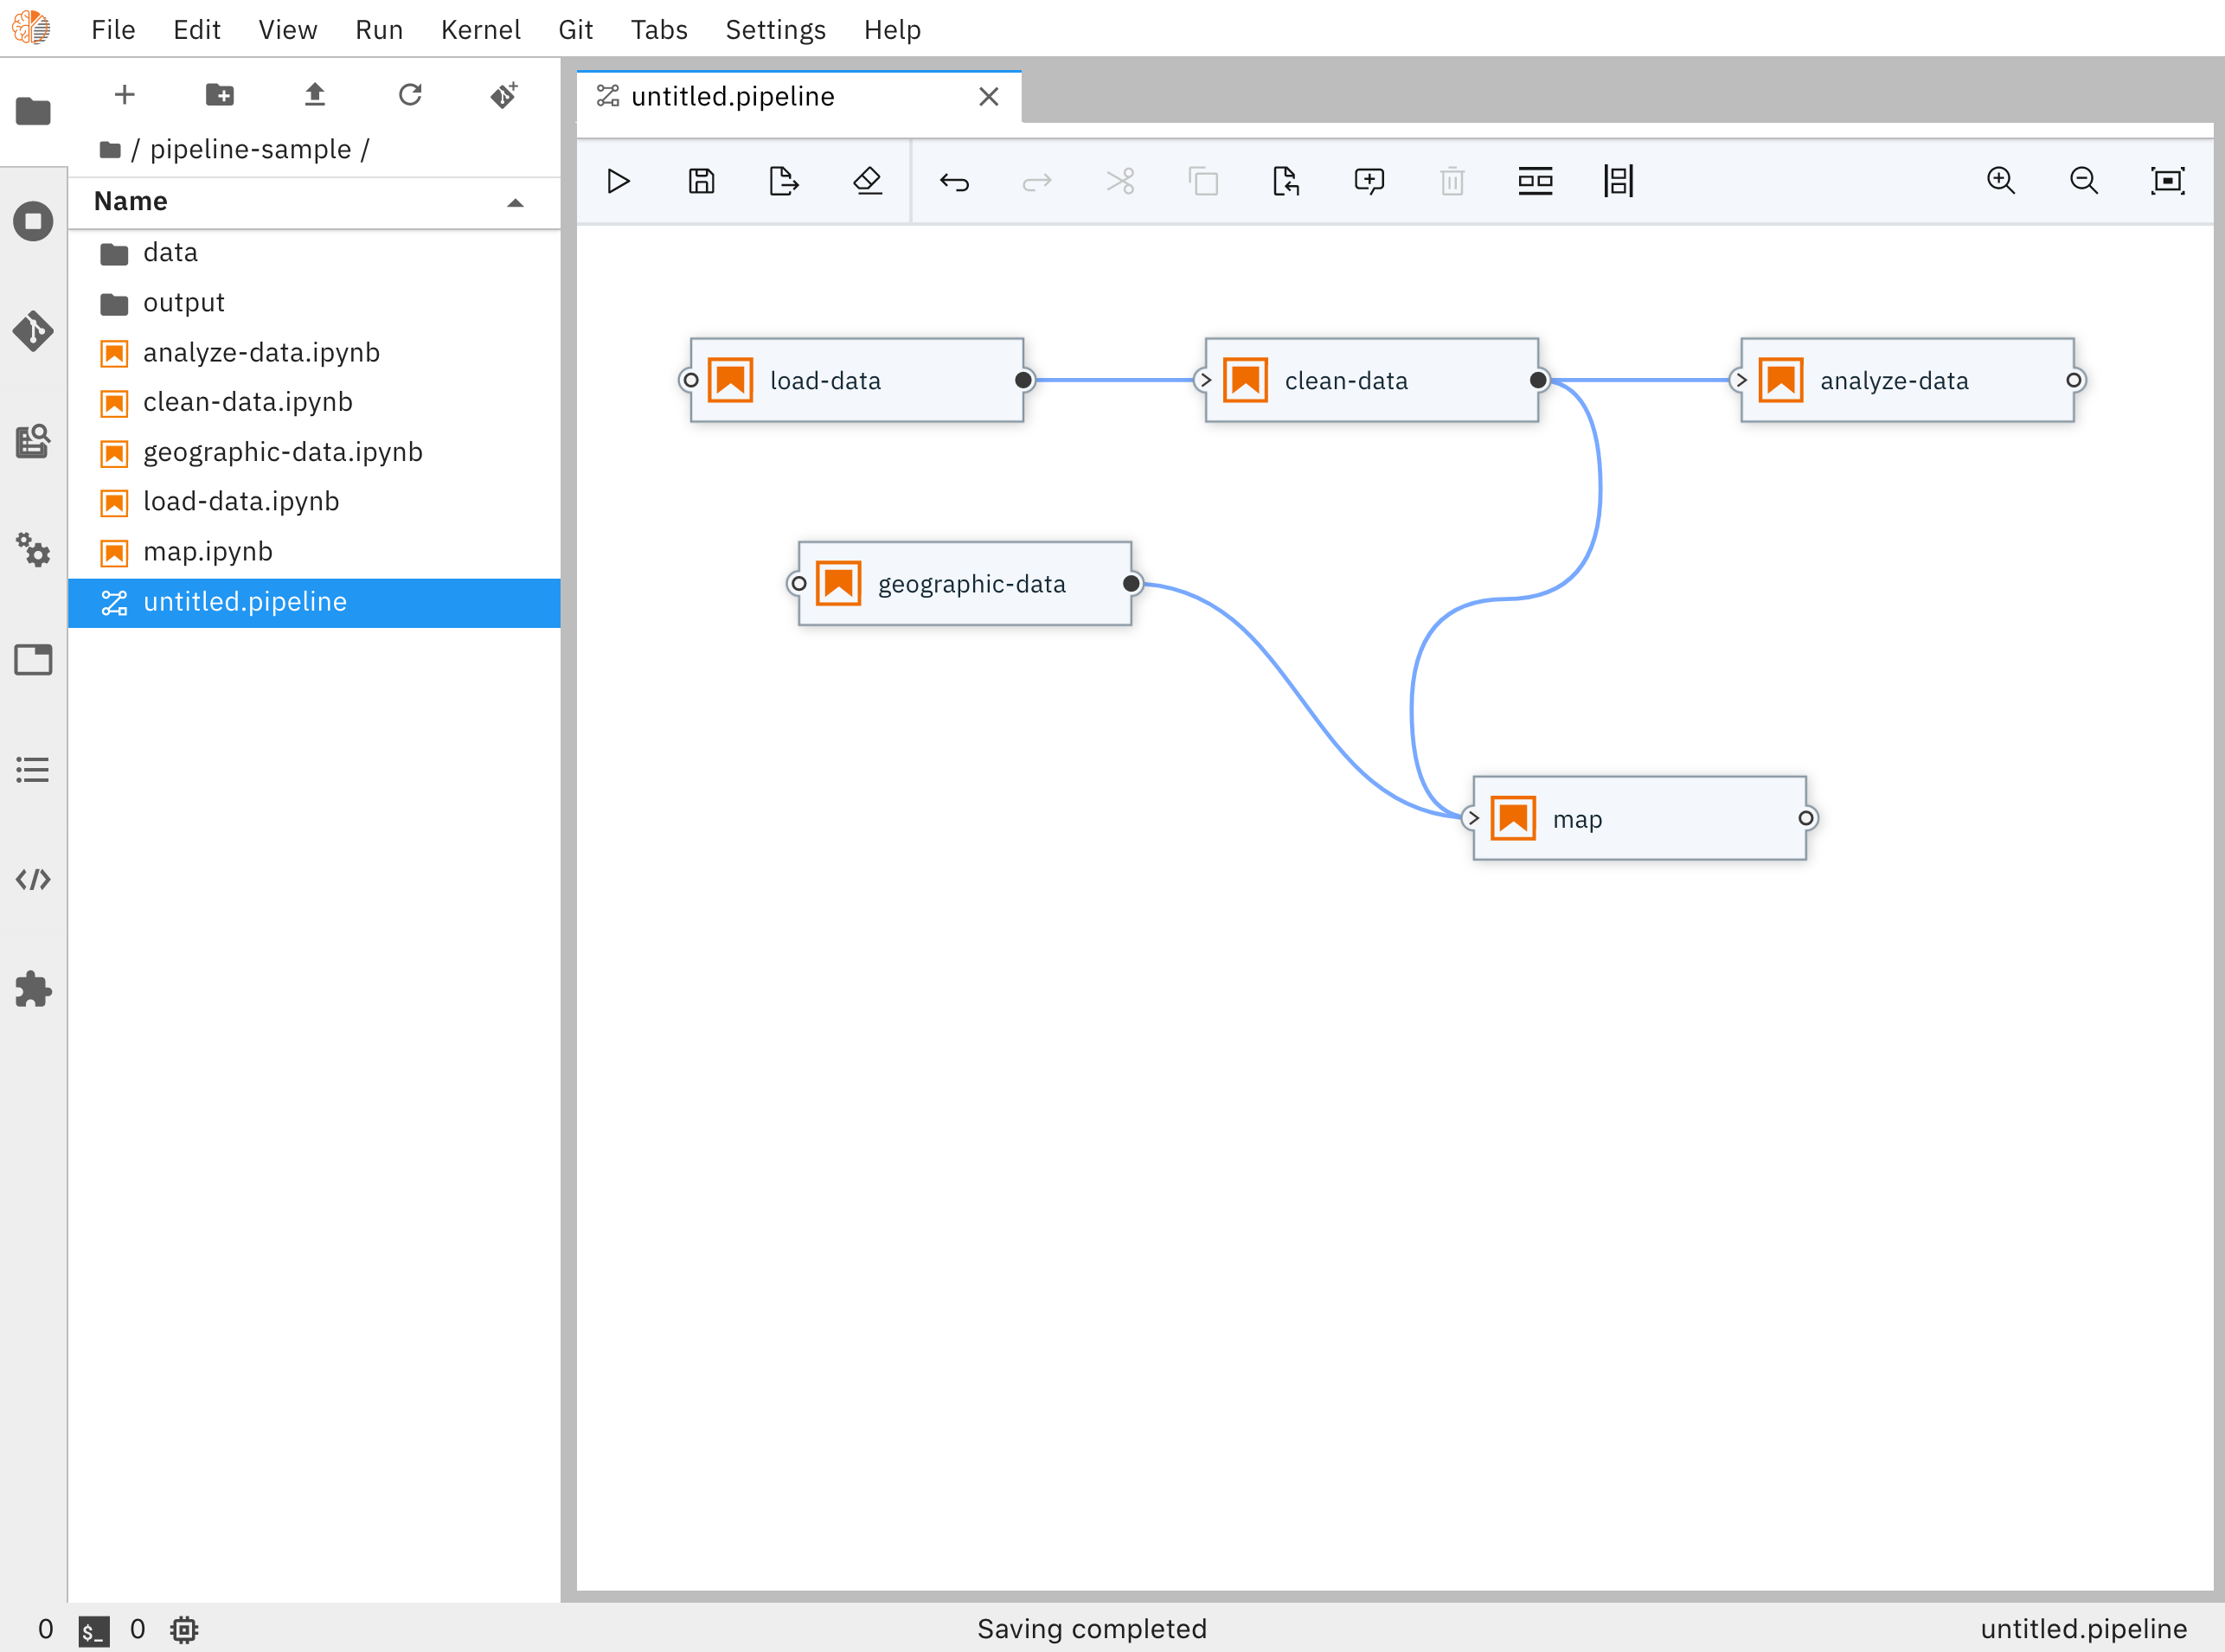 Notebook Pipeline Editor
Each pipeline node, which in this case represents a Notebook, provides a menu that provides access to opening the notebook file directly in the Notebook Editor
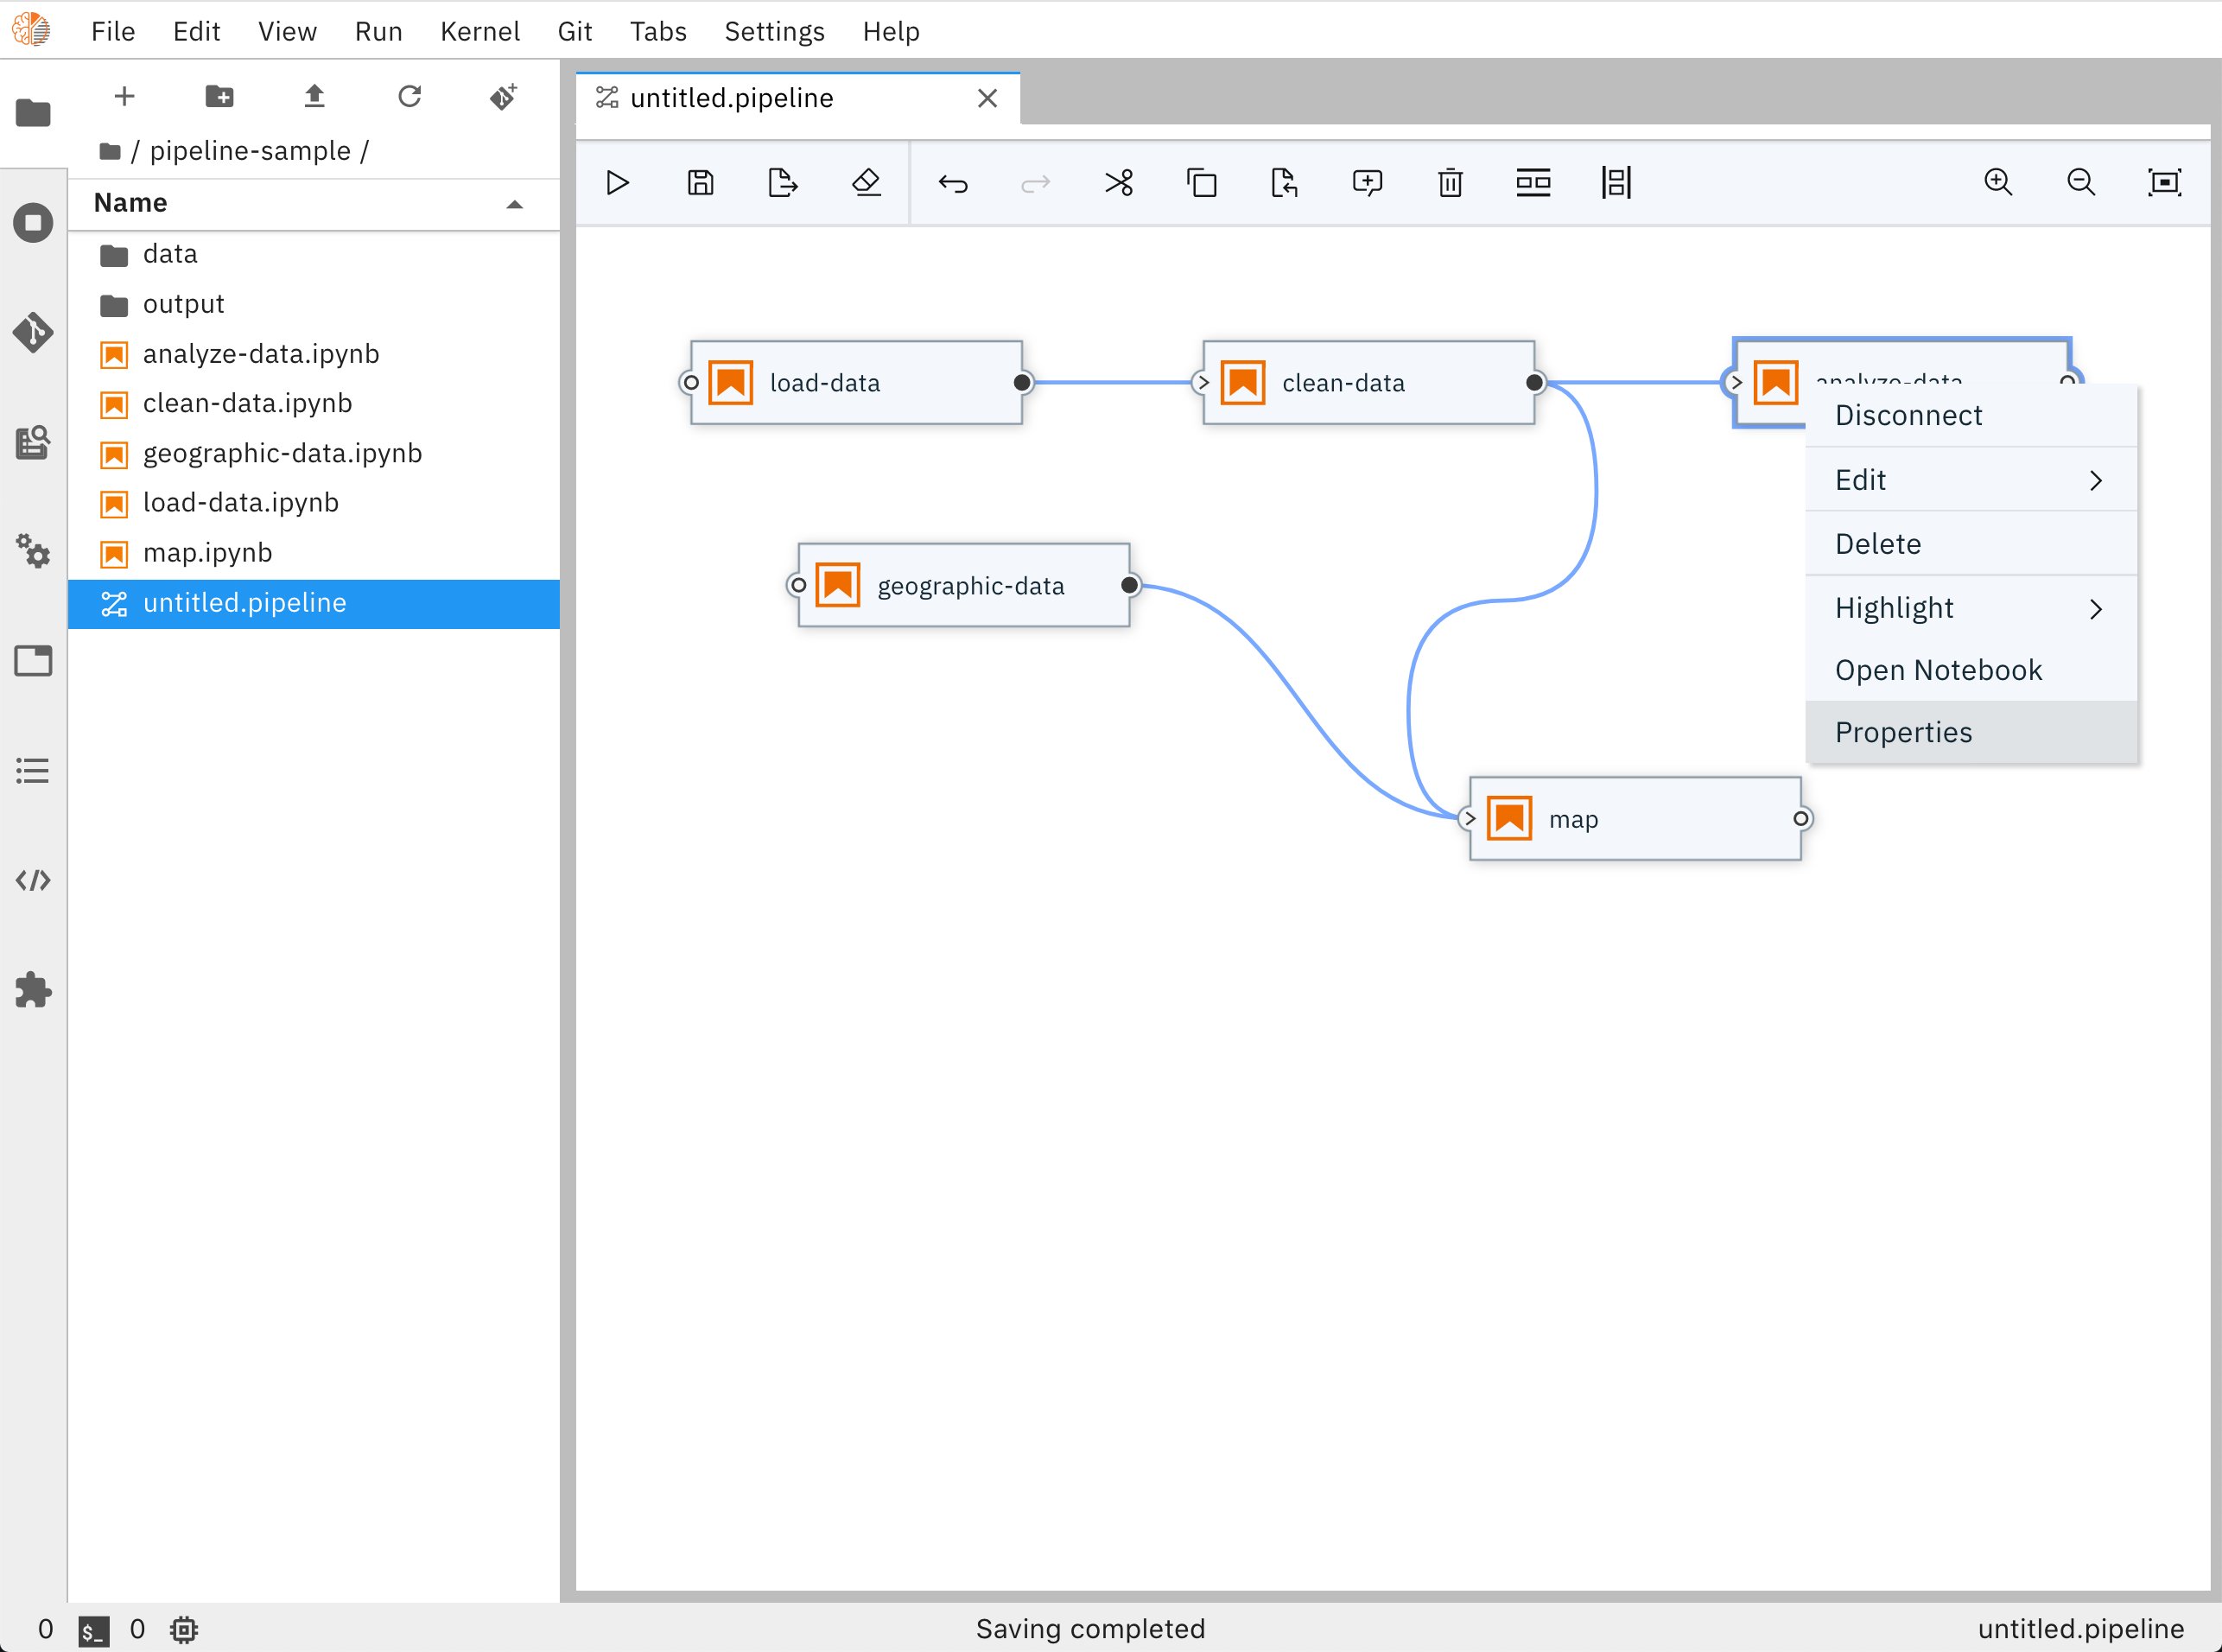 Notebook Pipeline Editor properties menu
The properties menu also enables users to set additional properties related to running this notebook (e.g. Environment Variables, File Dependencies, etc)
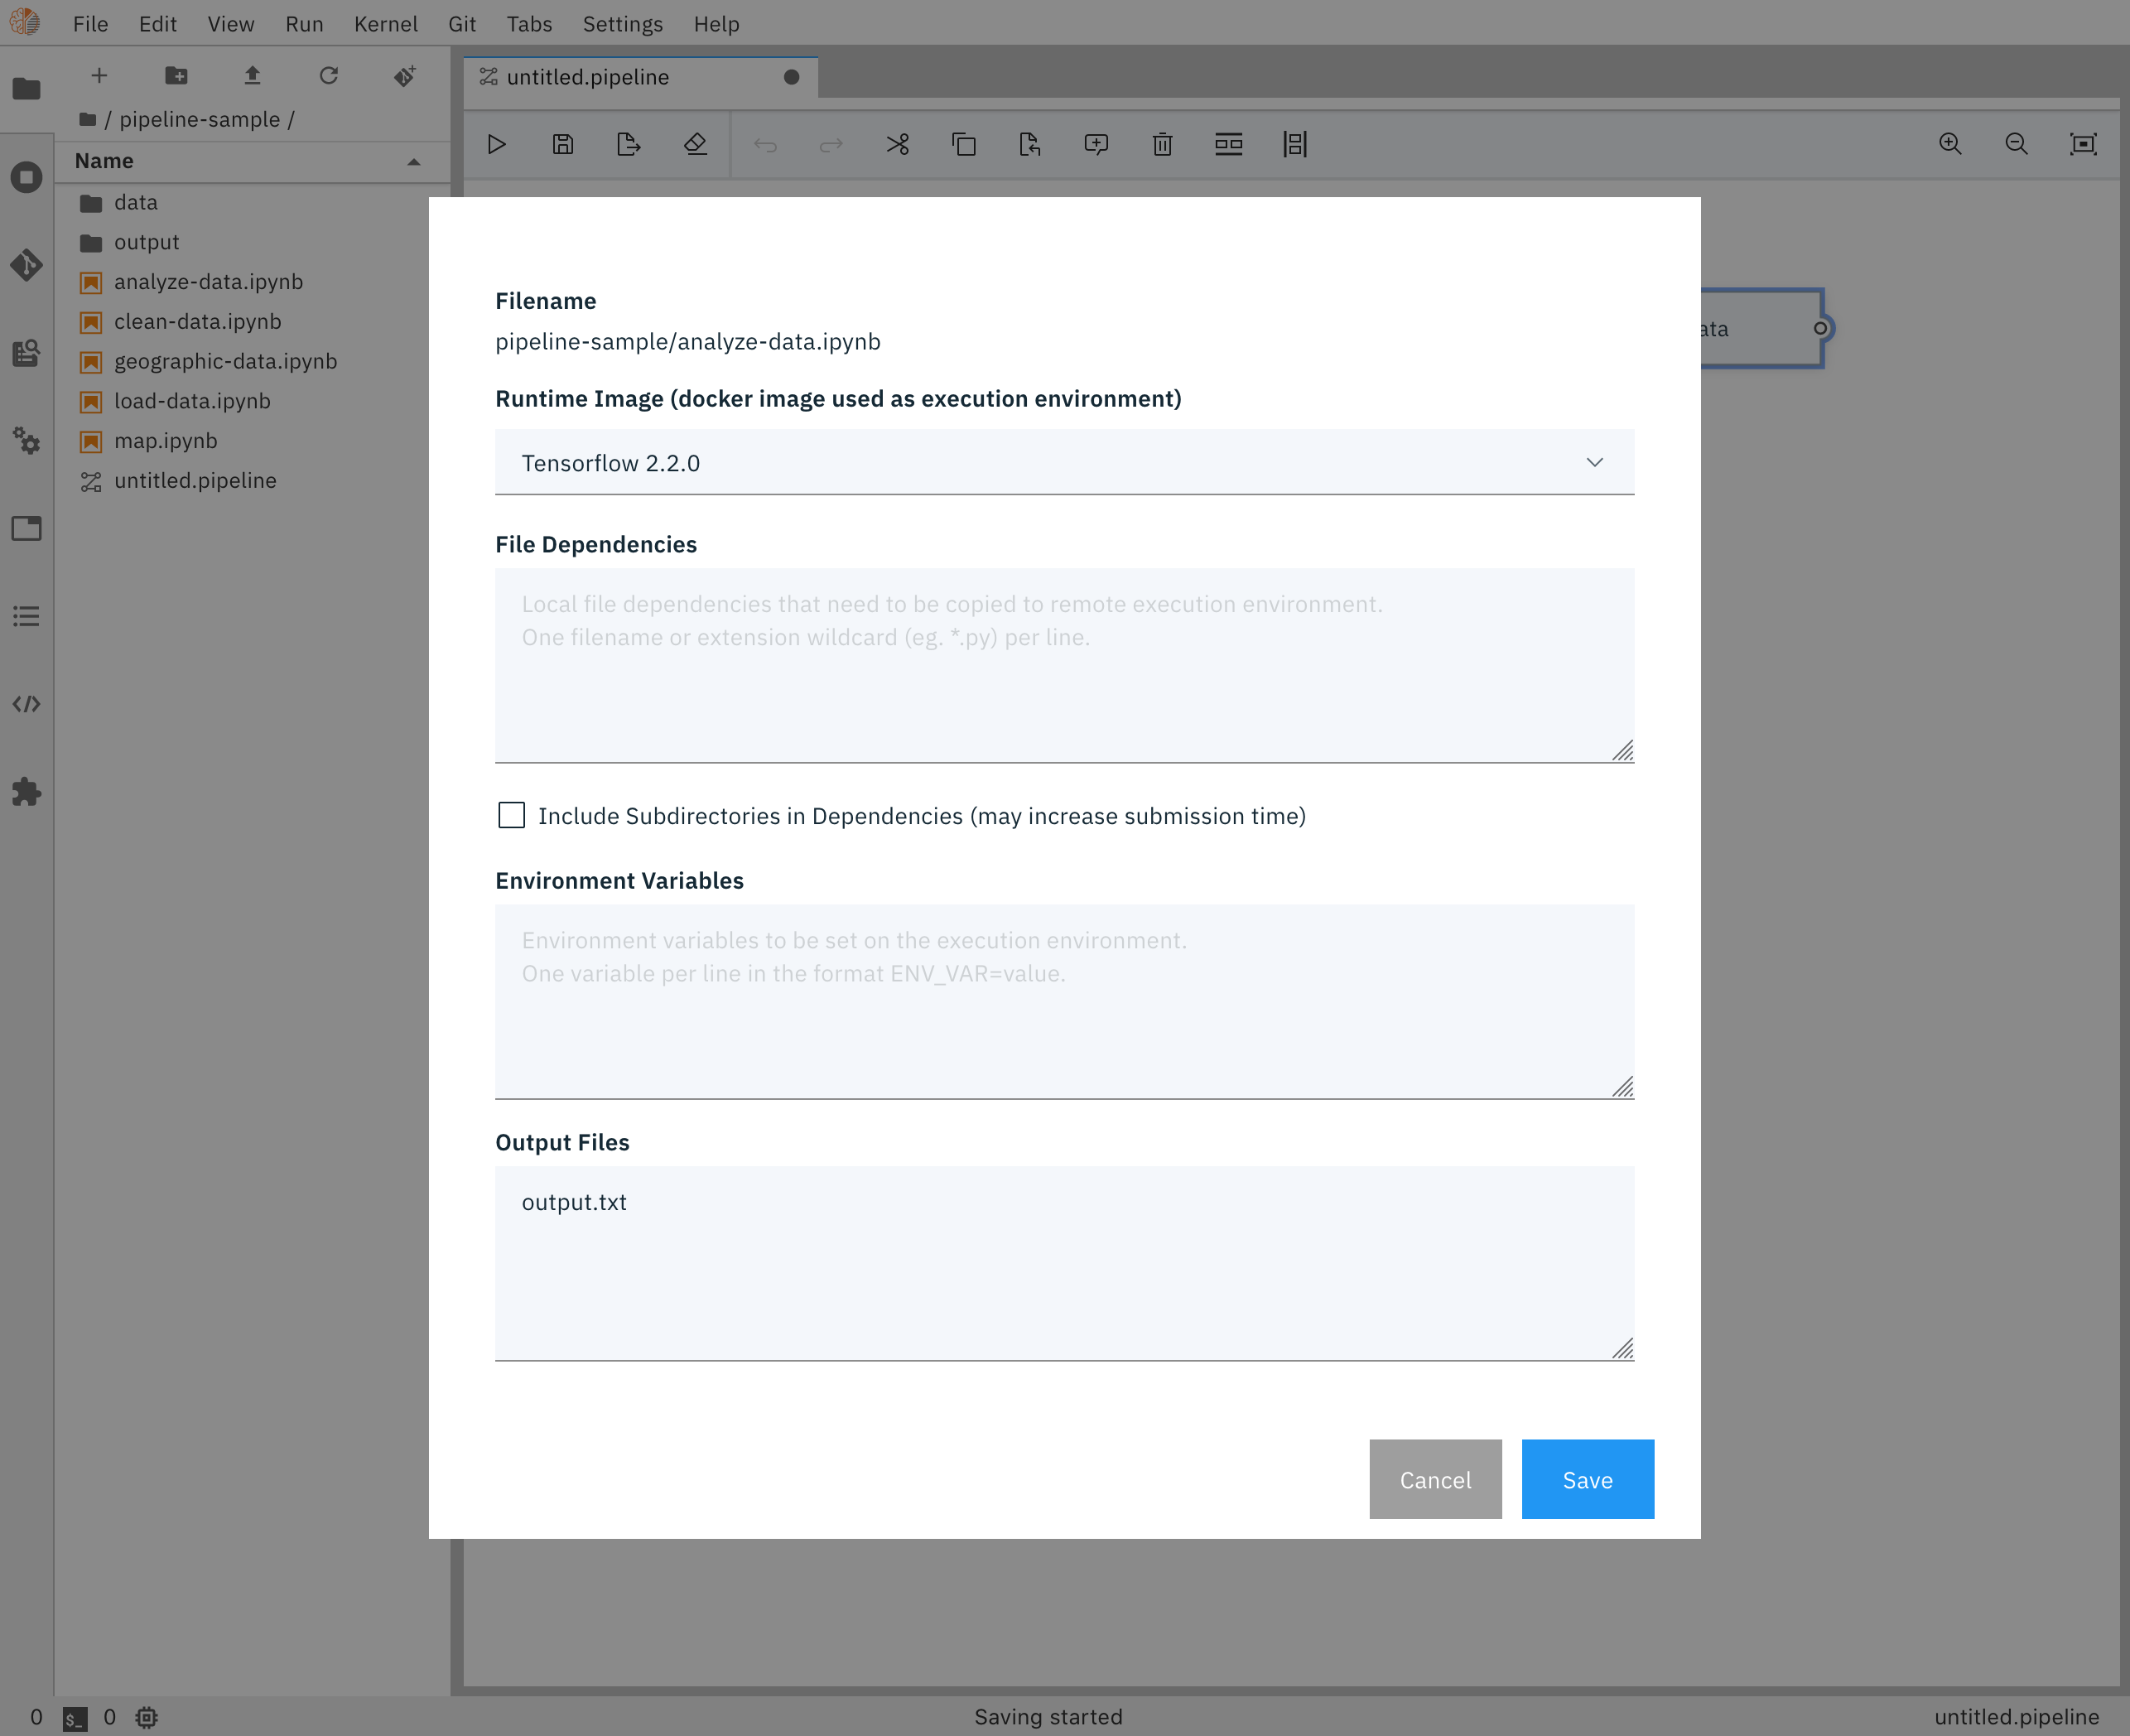 Notebook Pipeline Editor properties
Using the Elyra Pipeline Editor
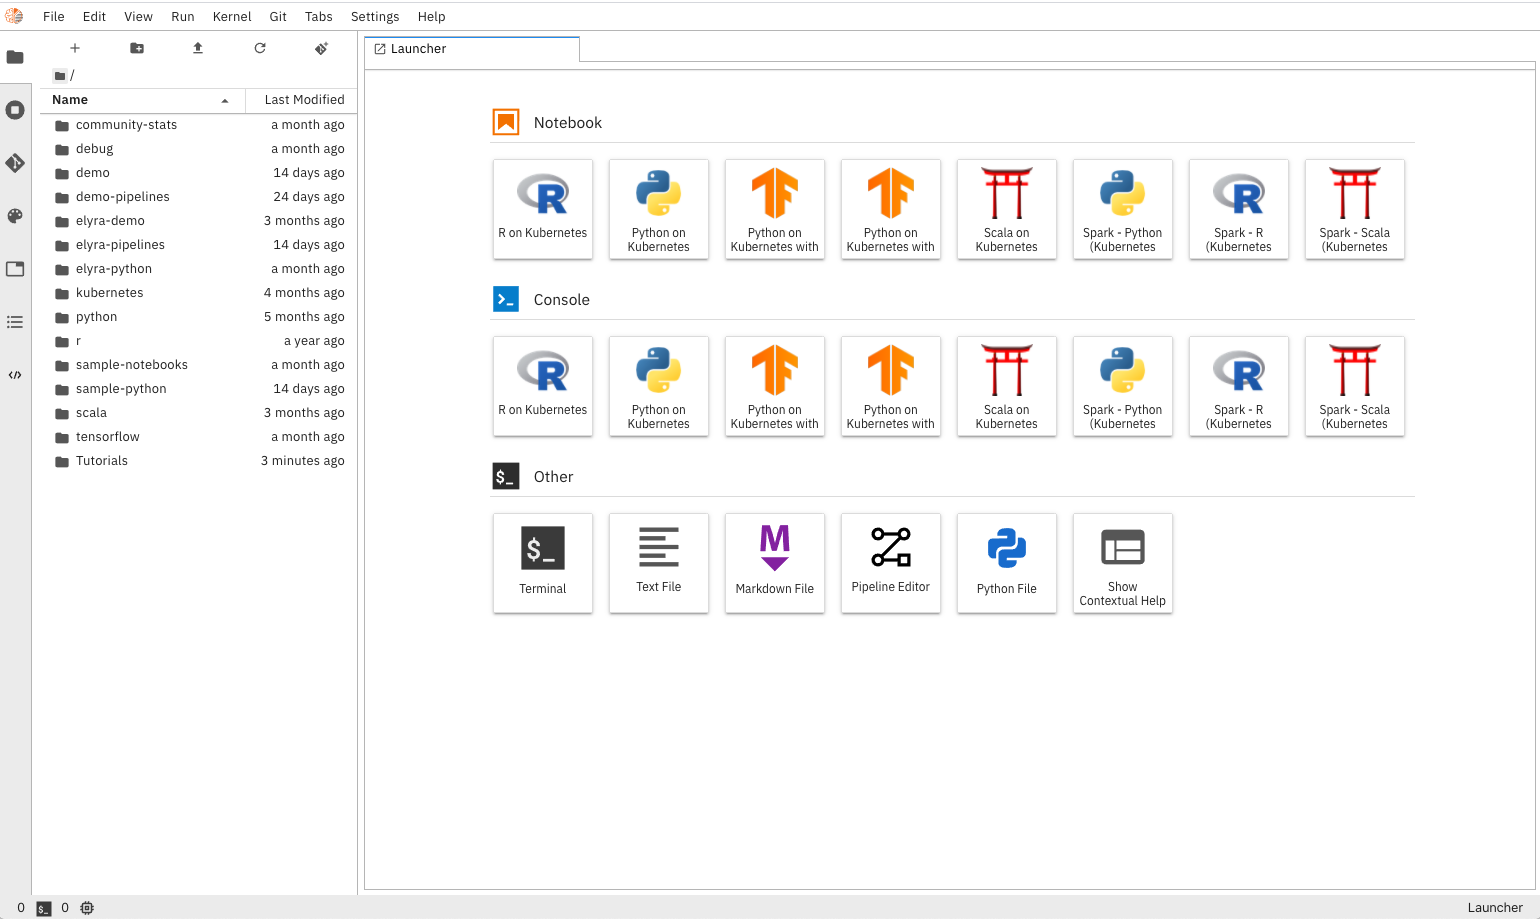 Main Page
- In the Jupyter Lab Launcher, click the
Pipeline EditorIcon to create a new pipeline. - On left side of the screen, navigate to your file browser, you should see a list of notebooks available.
- Drag each notebook, each representing a step in your pipeline, to the canvas. Repeat until all notebooks needed for the pipeline are present.
- Define your notebook execution order by connecting them together to form a graph.
Pipeline Editor
- Define the properties for each node / notebook in your pipeline
| Parameter | Description | Example |
|---|---|---|
| Docker Image | The docker image you want to use to run your notebook | TensorFlow 2.0 |
| Output Files | A list of files generated by the notebook inside the image to be passed as inputs to the next step of the pipeline. One file per line. | contributions.csv |
| Env Vars | A list of environment variables to be set inside in the container. One variable per line. | GITHUB_TOKEN = sometokentobeused |
| File Dependencies | A list of files to be passed from the LOCAL working environment into each respective step of the pipeline. Files should be in the same directory as the notebook it is associated with. One file per line. |
dependent-script.py |
Pipeline Node Properties
- Click on the
RUNIcon and give your pipeline a name. - Hit
OKto start your pipeline. - Use the link provided in the response to your experiment in Kubeflow. By default, Elyra will create the pipeline template for you as well as start an experiment and run.
 Pipeline Flow
Distributing Your Pipeline
Oftentimes you’ll want to share or distribute your pipeline (including its notebooks and their dependencies) with colleagues. This section covers some of the best practices for accomplishing that, but first, it’s good to understand the relationships between components of a pipeline.
Pipeline Component Relationships
The primary component of a pipeline is the pipeline file itself. This JSON file (with a .pipeline extension) contains all relationships of the pipeline. The notebook execution nodes each specify a notebook file (a JSON file with a .ipynb extension) who’s path is currently relative to the working directory of the hosting notebook server (or the notebook server workspace). Each dependency of a given node is relative to the notebook location itself - not the notebook server workspace. When a pipeline is submitted for processing or export, the pipeline file itself is not sent to the server, only a portion of its contents are sent.
Distributing Pipelines - Best Practices
Prior to distributing your pipeline - which includes preserving the component relationships - it is best to commit these files (and directories) to a GitHub repository. An alternative approach would be to archive the files using tar or zip, while, again, preserving the component relationships relative to their location within the notebook server workspace.
When deploying a shared or distributed pipeline repository or archive, it is very important that the pipeline notebooks be extracted into the same directory hierarchy relative to the target notebook server’s workspace.
Scenario - Single Project in Workspace
If you archived your pipeline into a GitHub repository named my_analytics_pipeline directly from the notebook server’s workspace (i.e., not within a sub-directory of the workspace), then consumers of this archive would need to do the following:
- Clone your repository
git clone https://github.com/<your-github-org>/my_analytics_pipeline.git - Change directory to
my_analytics_pipeline(this preserves the relative location of the notebook nodes relative to the workspace) - Run
jupyter-lab - In a browser, open the pipeline file
Note that the change directory to my_analytics_pipeline can be avoided by setting the notebook workspace as an option to jupyter-lab: jupyter-lab --notebook-dir=<path to parent of>/my_analytics_pipeline
Scenario - Multiple Projects in Workspace
The scenario above describes behavior if you wanted to have a single pipeline “project” in your workspace. To accommodate multiple pipeline projects within a single workspace, you will want to build the project within a sub-directory of the notebook server workspace and capture it such that the sub-directory is included in the captured results. This way, its extraction, again into the same location relative to the notebook server’s workspace, will preserve the relative paths to the notebook files.
Confirming Notebook Locations
An easy way to confirm that your extracted pipeline’s notebook references are correctly located is to double-click the notebook node in your pipeline and ensure the notebook appears in an adjacent tab. If nothing happens or a 404 error shows on the server’s console, the notebook is not properly positioned relative to the server’s workspace, and attempts to run or export the pipeline will fail.
At this time, the only recourse, should it not be possible to fix the relative location via redeployment of the pipeline, would be to edit each of the filename: fields in the .pipeline file such that notebook locations are satisfied, then refresh the browser.